

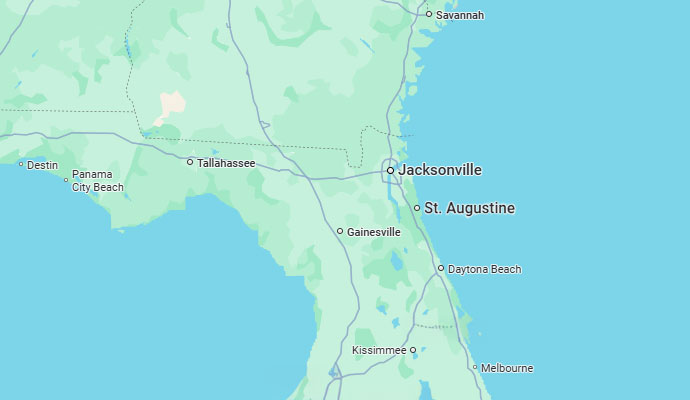
HURRICANE SEASON | NORTHEAST FLORIDA
Before the Storm: How to Prepare Your Existing Garage Door for Hurricane Season
Hurricane season starts June 1. If you live in Jacksonville, St. Johns County, Nocatee, Ponte Vedra, or anywhere else on Florida's First Coast, that's not a distant abstraction — it's a deadline. And the largest moving part of your home deserves a dedicated look before the first named storm forms in the Atlantic.
This guide is for homeowners who already have a door and want to know: is it ready? What should I check? What can I do myself, and what needs a professional?
The good news is that a lot of pre-season preparation is straightforward. The bad news is that skipping it can have consequences that go far beyond a broken spring.
904-584-4828Why Your Garage Door Is Your Home's Most Vulnerable Opening
Step 1: Find Out If Your Door Is Actually Wind-Load Rated
This is the most important thing on this list — and the one most homeowners skip.
Florida's building codes require garage doors to meet specific wind-load ratings based on location. St. Johns County and Duval County have their own standards, and homes closer to the coast face stricter thresholds. A door that isn't rated to those standards isn't just underperforming — it's a code violation.
Here's how to check:
- Look for a certification label on the inside of the door, typically on the top or middle panel. It will list the door's wind-load rating in pounds per square foot (PSF).
- If your door was installed before 2002, there's a reasonable chance it predates Florida's current code requirements and may not be wind-load certified at all.
- If you can't find a label, or you're not sure what the rating means for your specific address, a technician can assess it during an inspection.
| Community | Wind Exposure | Why It Matters |
|---|---|---|
| Ponte Vedra Beach / Vilano Beach | Highest — coastal exposure | Stricter wind-load thresholds; older doors often undersized |
| Nocatee / Palm Valley | High — near-coastal | Many builder-grade doors in newer communities |
| World Golf Village / Palencia | Moderate-high — inland buffer | Wind events still significant; door age is a factor |
| St. Augustine / Fleming Island | Moderate | Older homes may predate code updates |
| Mandarin / Ortega / San Marco | Moderate | Established neighborhoods; door age and condition vary widely |
A non-rated door in a rated county isn't just a safety risk — it's an insurance risk. Some carriers have denied hurricane claims when the failed component wasn't code-compliant at the time of loss.
Step 2: Look at Your Springs — Don't Skip This
Your garage door's springs do 90 percent of the heavy lifting every time the door moves. They're also the component most likely to fail without warning — and during a storm is the worst possible time for that to happen.
Before hurricane season, take a close look at the spring or springs above your door. Here's what to look for:
- Gaps or separation in the coil: A 2-inch gap in the spring means it's already broken. Don't attempt to operate the door.
- Surface rust: Northeast Florida's humidity and salt air accelerate corrosion. Surface rust isn't automatically a failure, but it shortens spring life. A technician can assess how much life remains.
- The heavy door test: Pull the emergency release cord and try to lift the door manually to waist height. Let go. A properly balanced door stays put. If it drops, the springs have lost tension and are failing.
- Noise changes: A door that's gotten louder, slower, or jerkier over the past few months is telling you something. Unusual sounds during operation often indicate spring fatigue before a visible failure.
One spring or two? Most double-car doors run on two springs. When one breaks, the other is typically within months of failing — it's been carrying the same load for the same number of years. If you're replacing one, replace both. It's more cost-effective than a second service call in the middle of storm season.
Step 3: Test Your Emergency Release — Before You Need It
Every automatic garage door opener has a red emergency release cord. It's designed to let you operate the door manually when the power goes out — which, in Northeast Florida, is a question of when, not if, during hurricane season.
The problem: many homeowners have never pulled that cord, and many emergency release mechanisms go years without being tested. Heat, humidity, and age can make them stiff or unresponsive.
Here's how to test it properly:
- Make sure the door is fully closed before you do anything. Never pull the release cord on a partially-open door — it can come down fast.
- Pull the red cord straight down. You should feel or hear a click as the trolley disengages.
- Try to lift the door by hand. With working springs, this should require modest effort. If the door is extremely heavy or won't move, your springs need attention before storm season.
- To re-engage: pull the cord back toward the opener unit at an angle, then run the opener — it will reconnect the trolley automatically as the door moves.
- If the cord is brittle, frayed, or the mechanism feels stiff, let a technician look at it. Some older release mechanisms need lubrication or replacement.
Safety note for storm prep: If a named storm is approaching and you need to manually lock your door, engage the slide lock or drop bar on the inside after disconnecting from the opener. This prevents the door from racking or shifting during high winds. Never leave a disengaged door unsecured during a storm — wind can get under it.
Step 4: Inspect the Bottom Seal and Weatherstripping
Florida thunderstorms don't knock politely. If your door's bottom seal is cracked, compressed, or missing sections, you're not just looking at a wet garage floor — you're losing the pressure seal that helps the door perform as a system during a storm.
The bottom seal is the rubber gasket at the base of the door. It compresses against the floor when the door closes, blocking water, pests, and air infiltration. In Northeast Florida's heat and UV exposure, rubber seals degrade faster than in other climates.

How to check it:
- Close the garage door and turn off the lights inside. If you see daylight coming through at the bottom, the seal has failed.
- Look at the seal's surface: it should be flexible and intact. If it's cracking, pulling away from the door, or visibly compressed flat, it needs replacement.
- Walk the perimeter and check the side and top weatherstripping as well. Torn or separated strips let wind and water find their way in.
Bottom seal replacement is one of the more accessible DIY maintenance items — but only if the retainer track is in good shape. Bent or rusted tracks won't hold a new seal correctly, and the door needs to be level for the seal to contact the floor evenly. If you see waves in the seal or uneven contact across the bottom, the door balance may need adjustment first.
Step 5: Check Hardware, Cables, and Track
The mechanical systems holding your door together take thousands of cycles of stress per year. Before storm season, a visual inspection of the hardware is worth the five minutes it takes.
Cables
Lift cables run from the bottom corners of the door up to the cable drum. Look along the full length of each cable for:
- Fraying, kinking, or individual strands that have separated from the main cable
- Rust or corrosion, especially at the attachment points at the bottom bracket
- Cables that look slack or uneven — this often indicates a spring is failing
A frayed cable under load can snap without warning. This is a professional repair — the cable is under significant tension and requires the right tools to replace safely.
Hinges and Rollers
Garage door panels are connected by hinges, and the door rides on rollers that run inside the track. Before storm season:
- Check each hinge for cracks or rust. A cracked hinge on a heavy door is a failure point waiting to happen.
- Spin each roller by hand if accessible. It should spin freely with no wobble. Worn or cracked rollers cause tracking problems and put extra stress on the opener and springs.
- Tighten any visibly loose bolts on hinge brackets or track mounts with the appropriate wrench.
Track
The tracks guide your door's movement. Look for:
- Gaps between the track and the wall mounting bracket — these indicate the track has shifted
- Bends or crimps in the track, which cause the door to bind or jump
- Debris accumulation inside the track — the track should stay clean and dry, not lubricated
Step 6: Lubricate the Right Parts
A properly lubricated door runs quieter, operates more smoothly, and puts less strain on every connected component. Pre-season is the right time to do this.
What to lubricate and what to use:
- Springs: Apply a thin coat of white lithium grease or dedicated garage door lubricant spray along the coils. This reduces friction and slows corrosion — both important in Northeast Florida's humid, salt-air environment.
- Rollers: Steel roller bearings get white lithium grease directly on the bearing. Nylon roller bearings get lubricant only if they're unsealed — the nylon wheel itself should stay dry.
- Hinges: A small amount of white lithium grease at the pivot point where the hinge pin meets the bracket.
- Bearing plates: Lubricate where the torsion bar sits in the bearing plates at each end.
- What NOT to lubricate: The tracks themselves should stay clean and dry. Lubricating the track creates a paste of grease and debris that causes the rollers to slip and the door to bind.
WD-40 is not a lubricant for garage doors. It's a water displacer and light solvent — it evaporates quickly, leaves parts dry, and washes away grease that was already doing its job. Stick to white lithium grease or a product specifically labeled for garage door use.
Step 7: Test Your Opener's Battery Backup
Modern garage door openers — anything installed in roughly the last five to seven years from LiftMaster, Chamberlain, or comparable brands — often include a built-in battery backup. During a power outage, the opener switches automatically and continues to function for dozens of cycles.
If yours has this feature, test it before storm season:
- Locate the battery unit (typically integrated into the opener body or attached nearby)
- Unplug the opener from the wall outlet and try to operate the door normally
- If the door operates, the battery is functional. If not, or if the backup indicator light is showing a warning, the battery may need replacement
Battery backup units typically last 1–3 years before the rechargeable cell degrades. If your backup hasn't been tested or replaced in that window, do it before June.
If your opener doesn't have battery backup — common in units installed before 2015 — this is a meaningful gap heading into storm season. An opener without backup means manual operation during every power outage, which in a multi-day storm event becomes a real logistical problem. Upgrading to a backup-equipped opener is a worthwhile investment for most Northeast Florida homes.
The WagMore Pre-Season Checklist
Use this as your go/no-go list before June 1:
| Check | What to Look For | |
|---|---|---|
| ☑️ | Wind-load rating verified | Find the certification label on the door panel; confirm it meets current St. Johns or Duval County code |
| ☑️ | Spring condition checked | No visible gaps, rust patches evaluated, heavy-door test passed |
| ☑️ | Emergency release tested | Cord functional, door lifts manually, re-engagement confirmed |
| ☑️ | Bottom seal inspected | No daylight visible, rubber intact and flexible, even contact with floor |
| ☑️ | Side/top weatherstripping checked | No tears, gaps, or separation |
| ☑️ | Cables inspected | No fraying, kinking, or corrosion at attachment points |
| ☑️ | Hinges and rollers checked | No cracks, wobble-free spin, bolts tightened |
| ☑️ | Track inspected | No gaps, bends, or debris buildup |
| ☑️ | Moving parts lubricated | Springs, rollers, hinges, bearing plates — white lithium grease |
| ☑️ | Battery backup tested | Door operates during simulated power outage, or backup scheduled |
What a Pre-Season Professional Inspection Covers
The checklist above covers what a homeowner can see and test from the floor. A professional inspection goes further:
- Door balance test — door disconnected from the opener and held at mid-point to assess spring tension precisely
- Spring wire gauge measurement and cycle life estimate — not just a visual check
- Opener force and auto-reverse calibration — a safety-critical setting that's easy to overlook and often drifts over time
- Track plumb and alignment with precision level
- Full 16-point system assessment covering every component from springs to sensors to bottom seal
If you haven't had a professional look at your door in more than a year, pre-season is the right time. The cost of a proper inspection is a fraction of what a storm-related repair or emergency call costs — and it's dramatically less than what happens when a garage door fails during a storm.
When Prep Isn't Enough: Knowing When to Replace
There are situations where pre-season maintenance is the right move, and situations where the honest answer is replacement. A door that's been repaired multiple times, shows significant panel damage, or was installed before current wind-load code requirements may not be worth another season of patching.
Ask yourself:
- Has this door been repaired more than once in the past 12 months?
- Is it more than 15–20 years old with no major component replacements?
- Do I know for certain it's wind-load rated for my county and proximity to the coast?
- Are multiple components showing wear at the same time?
If the answer to any of these is "not sure" or "yes," have a technician give you an honest assessment. The goal isn't to sell you a new door — it's to make sure you know what you're working with before a storm tests it.
Is Your Garage Door Ready for Hurricane Season?
Schedule a pre-season inspection before June 1. We'll assess your door's wind-load rating, spring condition, bottom seal, hardware, and emergency release — and give you a straight answer about what it needs.
WagMore Garage Doors


Garage Door Problems?
We turn "Uh-Oh" into
"ALL GOOD"
Is your garage door acting up? Don't worry, we've got you covered! Our expert technicians are here to diagnose and fix any garage door issues you may be experiencing. From broken springs to malfunctioning openers, the most likable techs you will ever meet will handle it all with precision and care.
Service Area
- Atlantic Beach
- Bartram Park
- Doctors Inlet
- Eagle Harbor
- Elkton
- Fleming Island
- Fleming Island Plantation
- Fruit Cove
- Green Cove Springs
- Hastings
- Jacksonville
- Jacksonville Beach
- Julington Creek Plantation
- Keystone Heights
- Lake Geneva
- Middleburg
- Neptune Beach
- Nocatee
- Oakleaf Plantation
- Orange Park
- Palm Coast
- Penney Farms
- Ponte Vedra
- Ponte Vedra Beach
- River Town
- Saint Augustine
- Saint Johns
- Sawgrass
- World Golf Village